As cybercrime rates continue to escalate year over year, it becomes crucial for businesses and organizations reliant on digital assets to enhance their online security measures. Organizations need to put in place measures to fight the most common attacks such as phishing. Through phishing attacks, hackers can obtain access to sensitive user information, enabling them to execute more sophisticated cyberattacks. One of the most effective methods to protect against such attacks is by employing phishing-resistant authentication techniques, such as passwordless login.
Microsoft, as a platform, offers several passwordless login options that users can utilize to access all of their online services, including Azure, Office 365, and more. One of these methods involves utilizing the Microsoft Authenticator App. This application can be easily installed on both iOS and Android devices, allowing users to access their Microsoft tenants without the need for passwords.
To enable passwordless login for your account and other designated users within your tenants, you must activate this option within Microsoft Entra ID. In this article, we will delve into how you can utilize Microsoft Entra ID to enable passwordless authentication using the Microsoft Authenticator App for your accounts. But before we proceed, let’s first explore a few basics including, why passwordless authentication is important, and the role of the Microsoft Entra ID.
What is passwordless authentication and its Benefits
Passwordless authentication is a method of accessing your device or online accounts without the need for a traditional password. Instead of relying on a memorized combination of characters, passwordless authentication uses alternative methods to verify your identity. The two main benefits of passwordless authentication include:
- Enhanced Security: Passwords are often prone to various security risks, such as phishing attacks, brute force attacks, and password theft. With passwordless authentication, these risks are significantly reduced or even eliminated. Since users no longer need to remember passwords, there is no risk of them being stolen through techniques like phishing.
- Improved User Experience: Traditional passwords can be cumbersome and frustrating for users to remember, leading to frequent password resets and authentication issues. Passwordless authentication simplifies the login process by removing the need to input a password altogether. This results in a smoother and more streamlined user experience, reducing user frustration and increasing overall satisfaction with the authentication process.
What is Microsoft Entra ID
Entra ID (formally called Azure Active Directory) is Microsoft’s cloud-based identity and access management solution. It offers authentication and authorization services to various Microsoft services such as Microsoft 365, Dynamics 365, and Microsoft Azure. With Entra ID, you can add and manage users that access the different Microsoft services that your organization uses. By using Entra ID, you can allow a given user or group of users to sign access to your tenant using a given passwordless authentication method. So, let’s explore more about this in the next section.
How to Enable Passwordless Authentication Using Entra ID
Follow these steps to enable passwordless sign-in with the authenticator app for your users:
Step 1: Sign in to the Microsoft Entra admin center
- Go to the Microsoft Entra admin center using your preferred web browser.
- Sign in with your credentials, ensuring that you have at least the role of an Authentication Policy Administrator. In this example, I used my global administrator account.
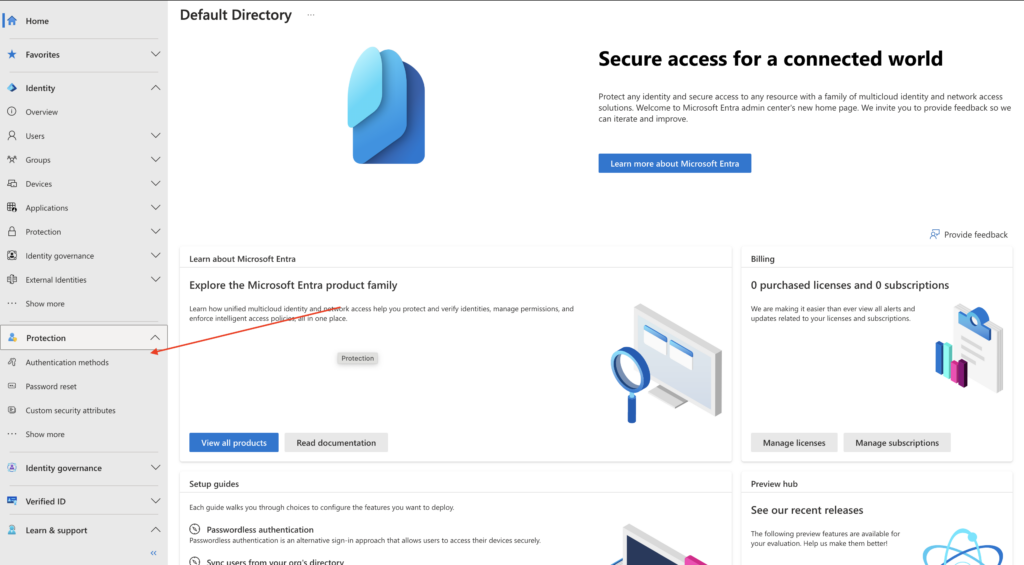
- Once signed in, navigate to the “Protection” section, then select “Authentication methods”, and finally click on “Policies”. Under Policies, you will see the different authentication methods supported by Microsoft. Choose Microsoft Authenticator as shown in the screenshot below.
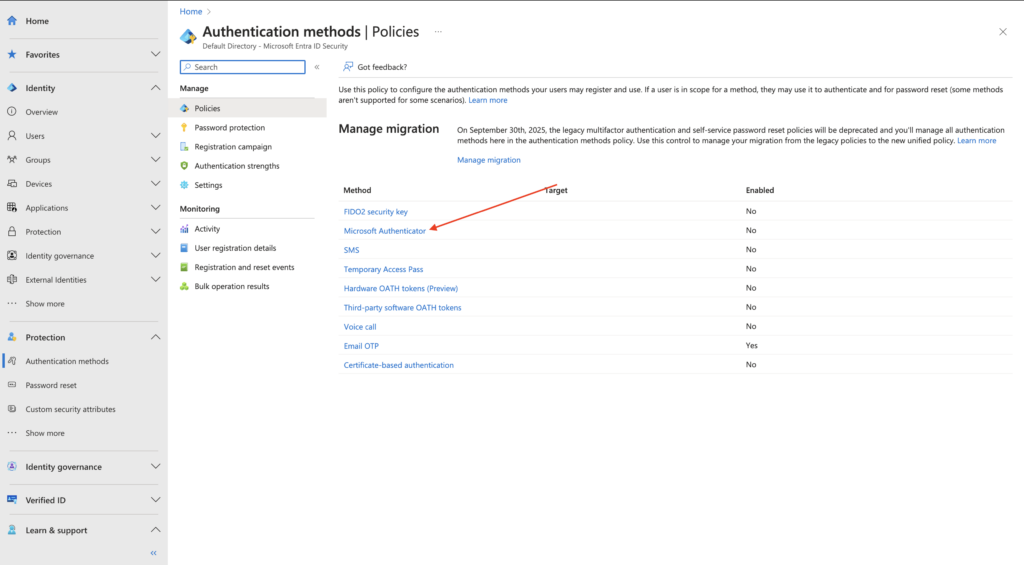
Step 2: Configure Microsoft Authenticator settings
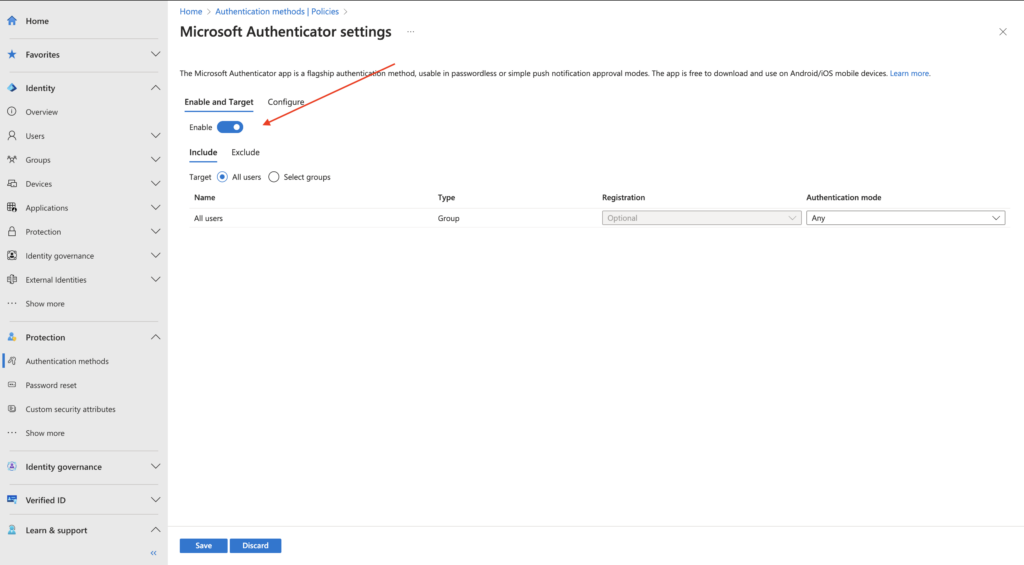
- Under the “Microsoft Authenticator” section, you’ll find options to configure the settings.
- Enable or disable Microsoft Authenticator using the “Enable” toggle switch.
- Choose the target users for whom you want to enable Microsoft Authenticator. You should select “All users” if you want to apply this to everyone in your organization or choose “Select users” or “Select Groups” if you want to specify particular users or groups. In this case, I selected all users.
Step 3: Set authentication mode for each user or group
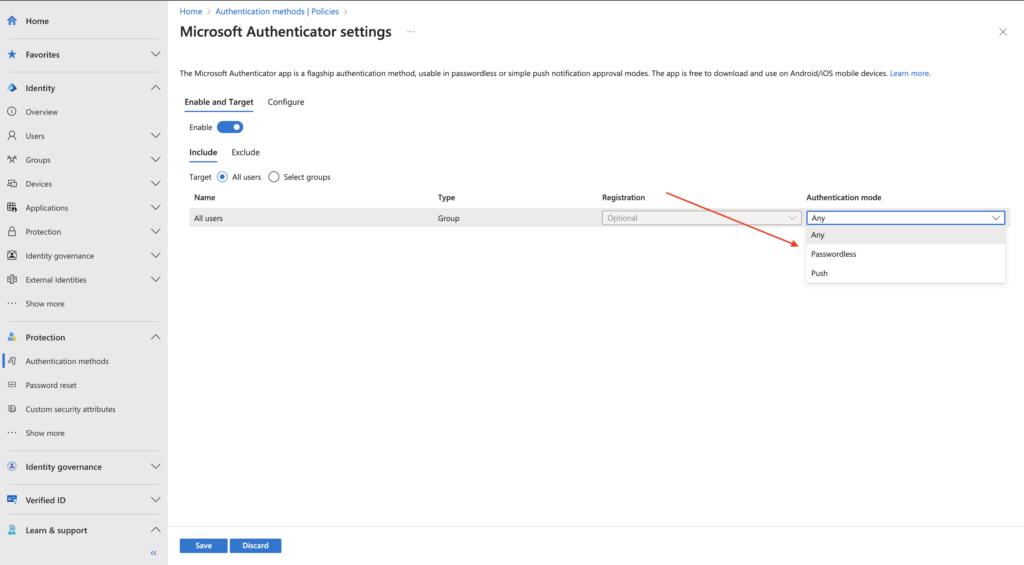
- By default, each added group or user is enabled to use Microsoft Authenticator in both passwordless and push notification modes (“Any” mode).
- For each row representing a group or user, you can change the authentication mode. Select “Any” to allow users to use Microsoft Authenticator in both passwordless and push notification modes. Choose “Passwordless” to enforce passwordless authentication. Opt for “Push” if you want to restrict users to push notification mode and prevent the use of passwordless sign-in.
- After making your selections, click on “Save” to apply the new policy.
Adding Account to Authenticator app
After enabling passwordless sign-in for all users, your users will now need to add their accounts to the Authenticator app to start accessing your tenants without using a password. With the authenticator app, you can either add a personal account or a School/Work account.
These are the steps for adding an account to the Microsoft Authenticator app:
Step 1: Open the Authenticator App and Add Your Account
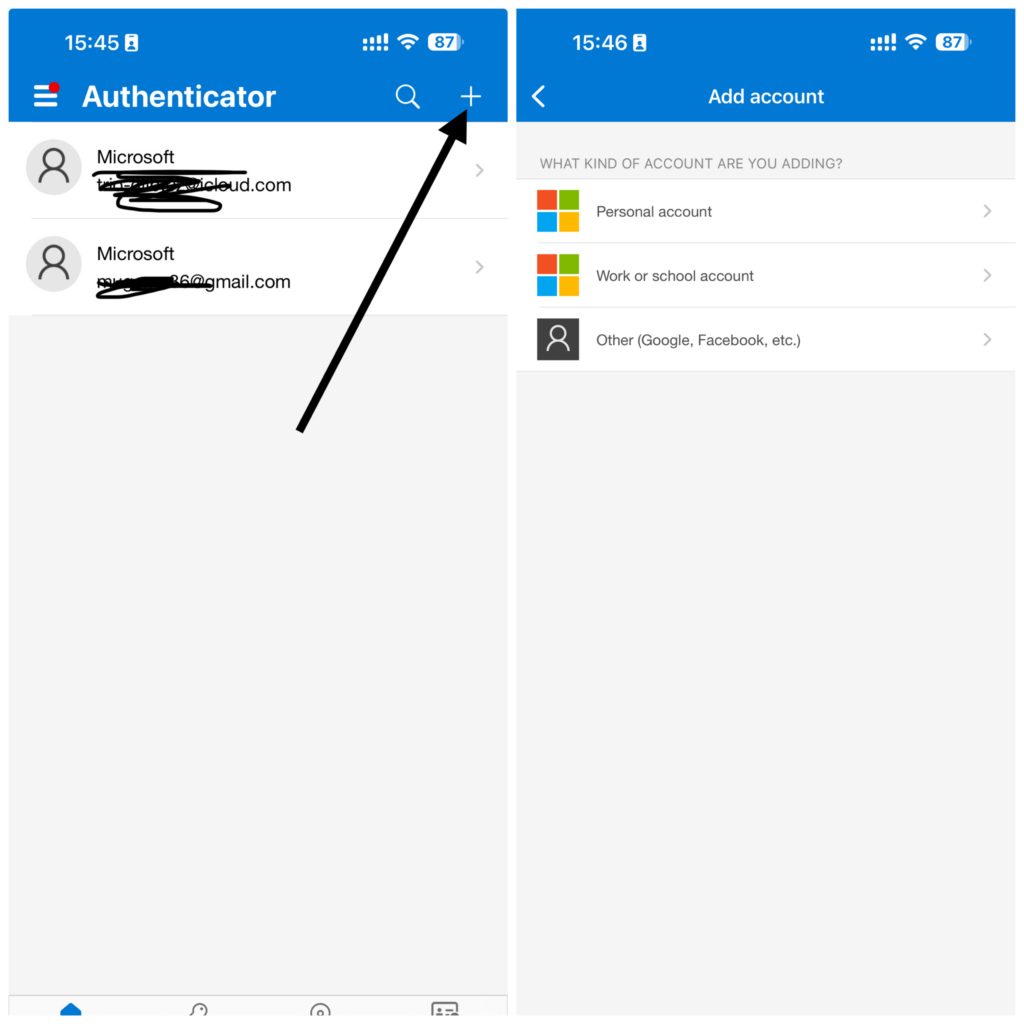
To start, open the Authenticator app on your device, which you can find in your list of installed applications. Inside the app, locate the option labeled “Add Account,” by tapping the plus icon in the top right corner. You’ll then be prompted to choose the type of account you wish to add, either a work/school account or a personal account, depending on your Microsoft account type.
Step 2: Sign in to Your Microsoft Account
After selecting the account type, proceed to sign in to your Microsoft account by entering your email address and associated password. Once the account is added to the Authenticator app, you can use it to log in the next time you access your account on another device, such as a PC.
Step 3: Sign In Using a Browser on Your PC
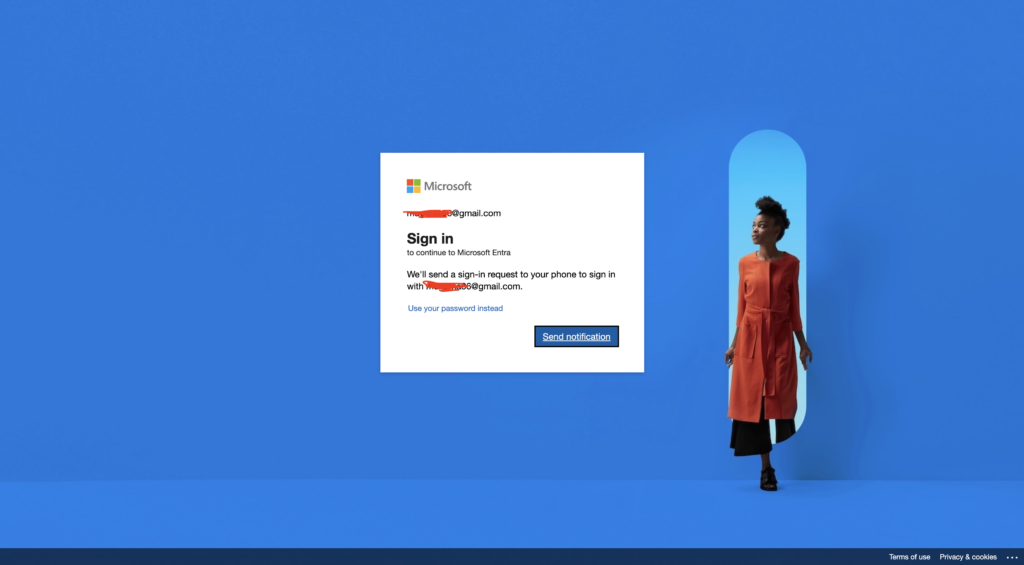
Whenever you attempt to sign in to your account on your PC or any other device, you will see the “Send Notification” option after inputting the email address associated with your account. When you select the “Send Notification” option, Microsoft will send a notification to your device.
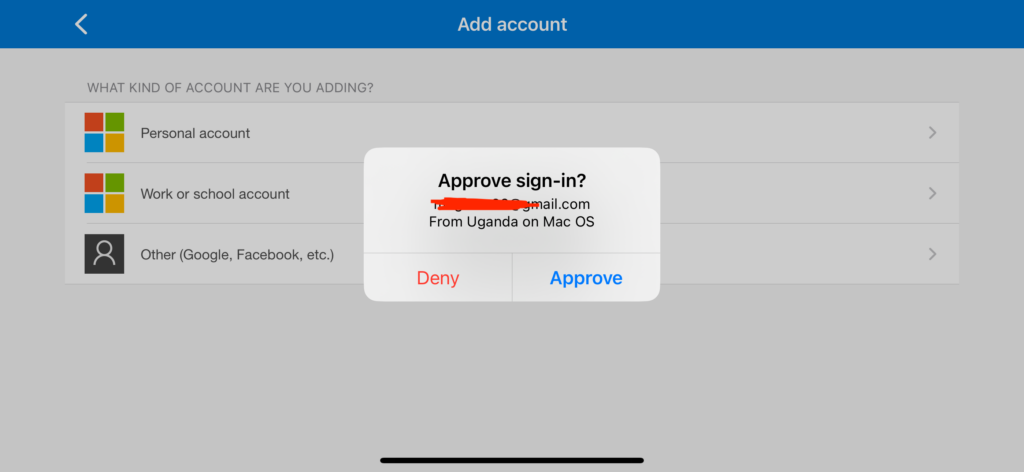
You’ll receive a pop-up notification through the Authenticator app, giving you the option to “Deny or Approve” the sign-in request. If it’s indeed you signing into the account, select “Approve,” and your sign-in attempt will be accepted automatically without needing to input a password.
Final Thoughts
By enabling passwordless login with the Microsoft Authenticator app through Microsoft Entra ID, you can significantly enhance the security of your organization’s online accounts. This method eliminates the risk of password theft from phishing attacks and simplifies the login process for your users. By using the few easy steps within Entra ID and the authenticator app covered in this article, you can empower your users to leverage the improved security and convenience of passwordless authentication.